
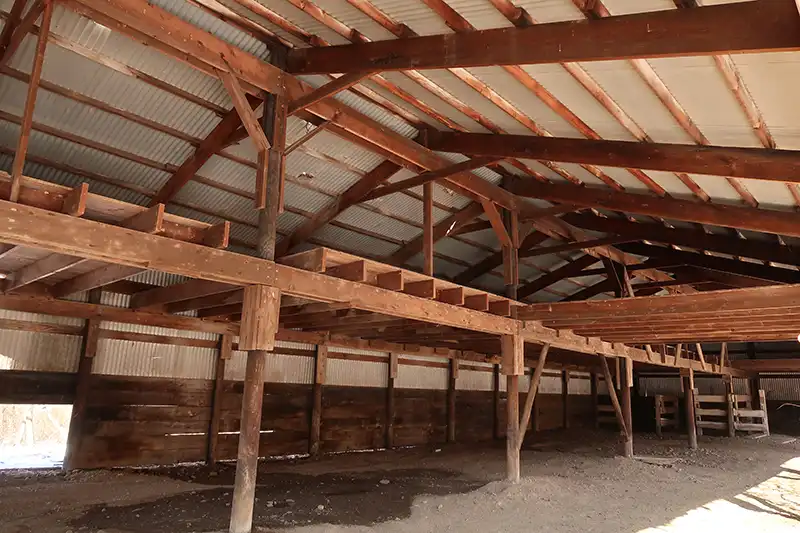
A pole barn is one of the most practical and affordable structures you can put on your property, but its biggest enemies are the ones you can’t see. Rot and termites quietly attack the very posts that hold your entire building up, and by the time you notice the damage, repairs can cost thousands. Protecting your investment starts with smart decisions during construction and continues with simple maintenance habits year after year.
The good news is that most rot and termite damage is completely preventable. With the right materials, proper site preparation, and a consistent inspection routine, your pole barn can easily outlast its expected lifespan without ever falling victim to decay or infestation.
Start With Pressure-Treated Posts Set Below the Frost Line
Your posts are the backbone of the entire structure, so they deserve the highest level of protection from day one. Always choose posts treated to American Wood Protection Association (AWPA) standards, specifically UC4B or UC4C, which are rated for ground contact and harsh soil conditions.
- Select posts treated with copper-based preservatives rather than older creosote formulas
- Set posts at least 36 to 48 inches deep, below your local frost line
- Pour concrete collars around post holes to lock out moisture and stabilize the base
- Crown the concrete slightly above grade so water sheds away from the wood
- Never cut post tops without retreating the exposed end grain with a brush-on preservative
Cutting corners on post treatment is the single most common reason pole barns fail early. Spending a little more upfront on properly treated lumber saves you from the nightmare of replacing structural posts down the road.
Control Moisture and Drainage Around the Entire Structure
Rot fungi and termites both thrive in damp environments, which means moisture control is your first line of defense. Water that pools around your pole barn saturates the soil, keeps post bases wet, and creates the perfect conditions for decay.
- Grade the soil so it slopes at least six inches away from the building on all sides
- Install gutters and downspouts that dump water at least five feet from the posts
- Add French drains or swales if your site has naturally poor drainage
- Keep mulch, firewood, and stored lumber at least a foot away from the exterior walls
- Maintain a gravel or crushed stone apron around the perimeter to discourage splash-back
Remember that water always wins if you give it a place to sit. A well-drained site keeps the bottom of your posts dry, and dry wood is wood that termites and fungus ignore.
Create a Termite Barrier Before and After Construction
Termites cause billions of dollars in damage to American structures every year, and pole barns with ground-contact posts are especially appealing targets. Blocking their path into the wood is far easier than evicting an established colony.
- Apply a liquid termiticide treatment to the soil around the post holes before setting posts
- Use physical barriers like stainless steel mesh or sand barriers during installation
- Consider post sleeves or Post Protector-style barriers that shield wood from soil contact entirely
- Keep at least six inches of exposed concrete or treated wood visible above grade
- Avoid stacking hay, cardboard, or scrap wood against the building exterior
Even with preventive treatments in place, an annual professional termite inspection is cheap insurance for a structure this size. Catching activity early means a localized treatment instead of a major rebuild.
Choose Rot-Resistant Materials for Every Exposed Surface
Posts aren’t the only wood at risk — siding, trim, and framing near the ground all face moisture exposure. Selecting the right materials for these zones dramatically extends the life of the whole building.
- Use ground-contact-rated lumber for any framing within eight inches of the soil
- Choose steel siding or fiber cement over raw wood panels in wet climates
- Apply quality exterior primer and paint to all exposed trim and doors
- Seal the post-to-truss connection points where water can collect and sit
- Opt for galvanized or stainless-steel fasteners that won’t corrode and stain the wood
Every exposed piece of wood is an invitation to nature, so treat each one like it matters. The extra cost of premium materials is a fraction of what you’d pay to replace rotted framing later.
Inspect and Maintain Your Pole Barn on a Schedule
The most effective protection strategy is simply paying attention. Most rot and termite damage is discovered years after it started, when repairs are expensive and structural integrity is compromised.
- Walk the perimeter every spring and fall, probing posts and base trim with a screwdriver
- Look for mud tubes along posts, a telltale sign of subterranean termites
- Check for soft, discolored, or crumbling wood at ground level
- Clear gutters, downspouts, and drainage paths of leaves and debris twice a year
- Reapply wood preservative or sealant to any exposed cuts, checks, or fasteners annually
Ten minutes of inspection twice a year can add decades to your barn’s life. If you spot early damage, localized repairs are fast, affordable, and stop the problem before it spreads to structural members.
A Protected Pole Barn Is a Pole Barn That Lasts
Protecting a pole barn from rot and termites isn’t a one-time project — it’s a mindset that starts at construction and continues every season after. The combination of properly treated posts, smart drainage, physical and chemical barriers, quality materials, and routine inspections covers every angle of attack. Pole barns built with these practices routinely stand for fifty years or more without structural decay.
Your barn protects your vehicles, equipment, livestock, and storage, so it’s worth protecting in return. Start with the fundamentals today, and you’ll enjoy a dry, solid, termite-free structure for generations to come.